
Christmas
Christmas
Cherry ornament in patchwork fabric
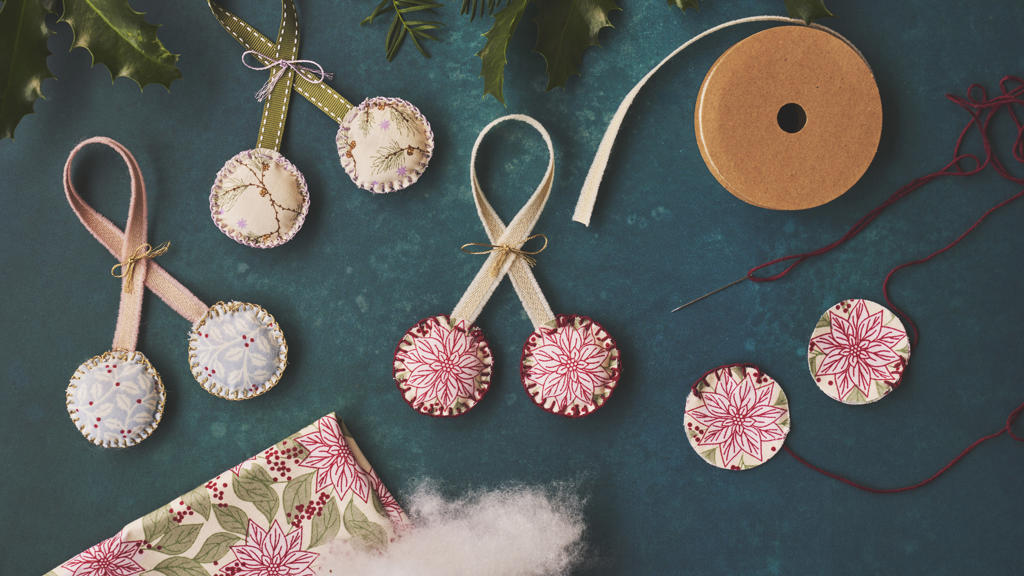
The homemade Christmas decorations can indeed be pretty and quirky if you ask the sisters. With Anna's guide to making beautiful cherries to adorn this year's Christmas tree, you can craft a wonderful addition to the traditional Christmas decorations.
Use a round object to draw a total of four circles on your patchwork fabric, and then cut them out. In the video, Anna used a napkin ring with a diameter of 5 cm.
Cut a piece of embroidery thread long enough to sew around the first circle. Tie a knot at one end of the thread and thread an embroidery needle at the other end.
Place the fabric with the wrong sides together. Sew a few stitches approx. 0.5 cm from the edge and continue to sew buttonhole stiches around the edge, as shown in the video. Remember to leave an opening of approx. 3-4 cm.
Fill the hole with polyester padding, and then cut a piece of approx. 24 cm ribbon. Place one end of it down into the opening. Sew across the opening with regular stitches to secure the ribbon and close the opening. Make sure to fasten at the last stitch. Now you have created the first cherry.
Create a noose on your ribbon. The noose should be large enough to hang on a branch on the Christmas tree. Sew through the points where the ribbons cross and tie a bow with the embroidery thread, as shown in the video.
Now repeat steps 2-5, so that your Christmas ornament ends up having two cherries. Hang the cherry ornaments on the Christmas tree, on a branch, or wherever you want it to decorate in the home.
-
Patchwork fabric
-
Embroidery thread
-
Padding for DIY
-
Ribbon
-
Scissors
-
Embroidery needle
-
Ballpoint pen
-
A round object


