- Vinsælar vörur
- Heimilið
- Sköpun
- Veisluvörur
- Ritföng
- Börnin
- Fylgihlutir
- Matur og drykkur
- Fegurð
- Útilíf


Christmas tree with paper rosettes 03. November 2022

Creative Christmas
When the sisters decorate for Christmas, they see many possibilities in what they already have. "With beautiful paper, your imagination is the only limit," Anna smiles as she hangs a lovely folded Christmas tree on a decorative branch.
Material List
Skref 1
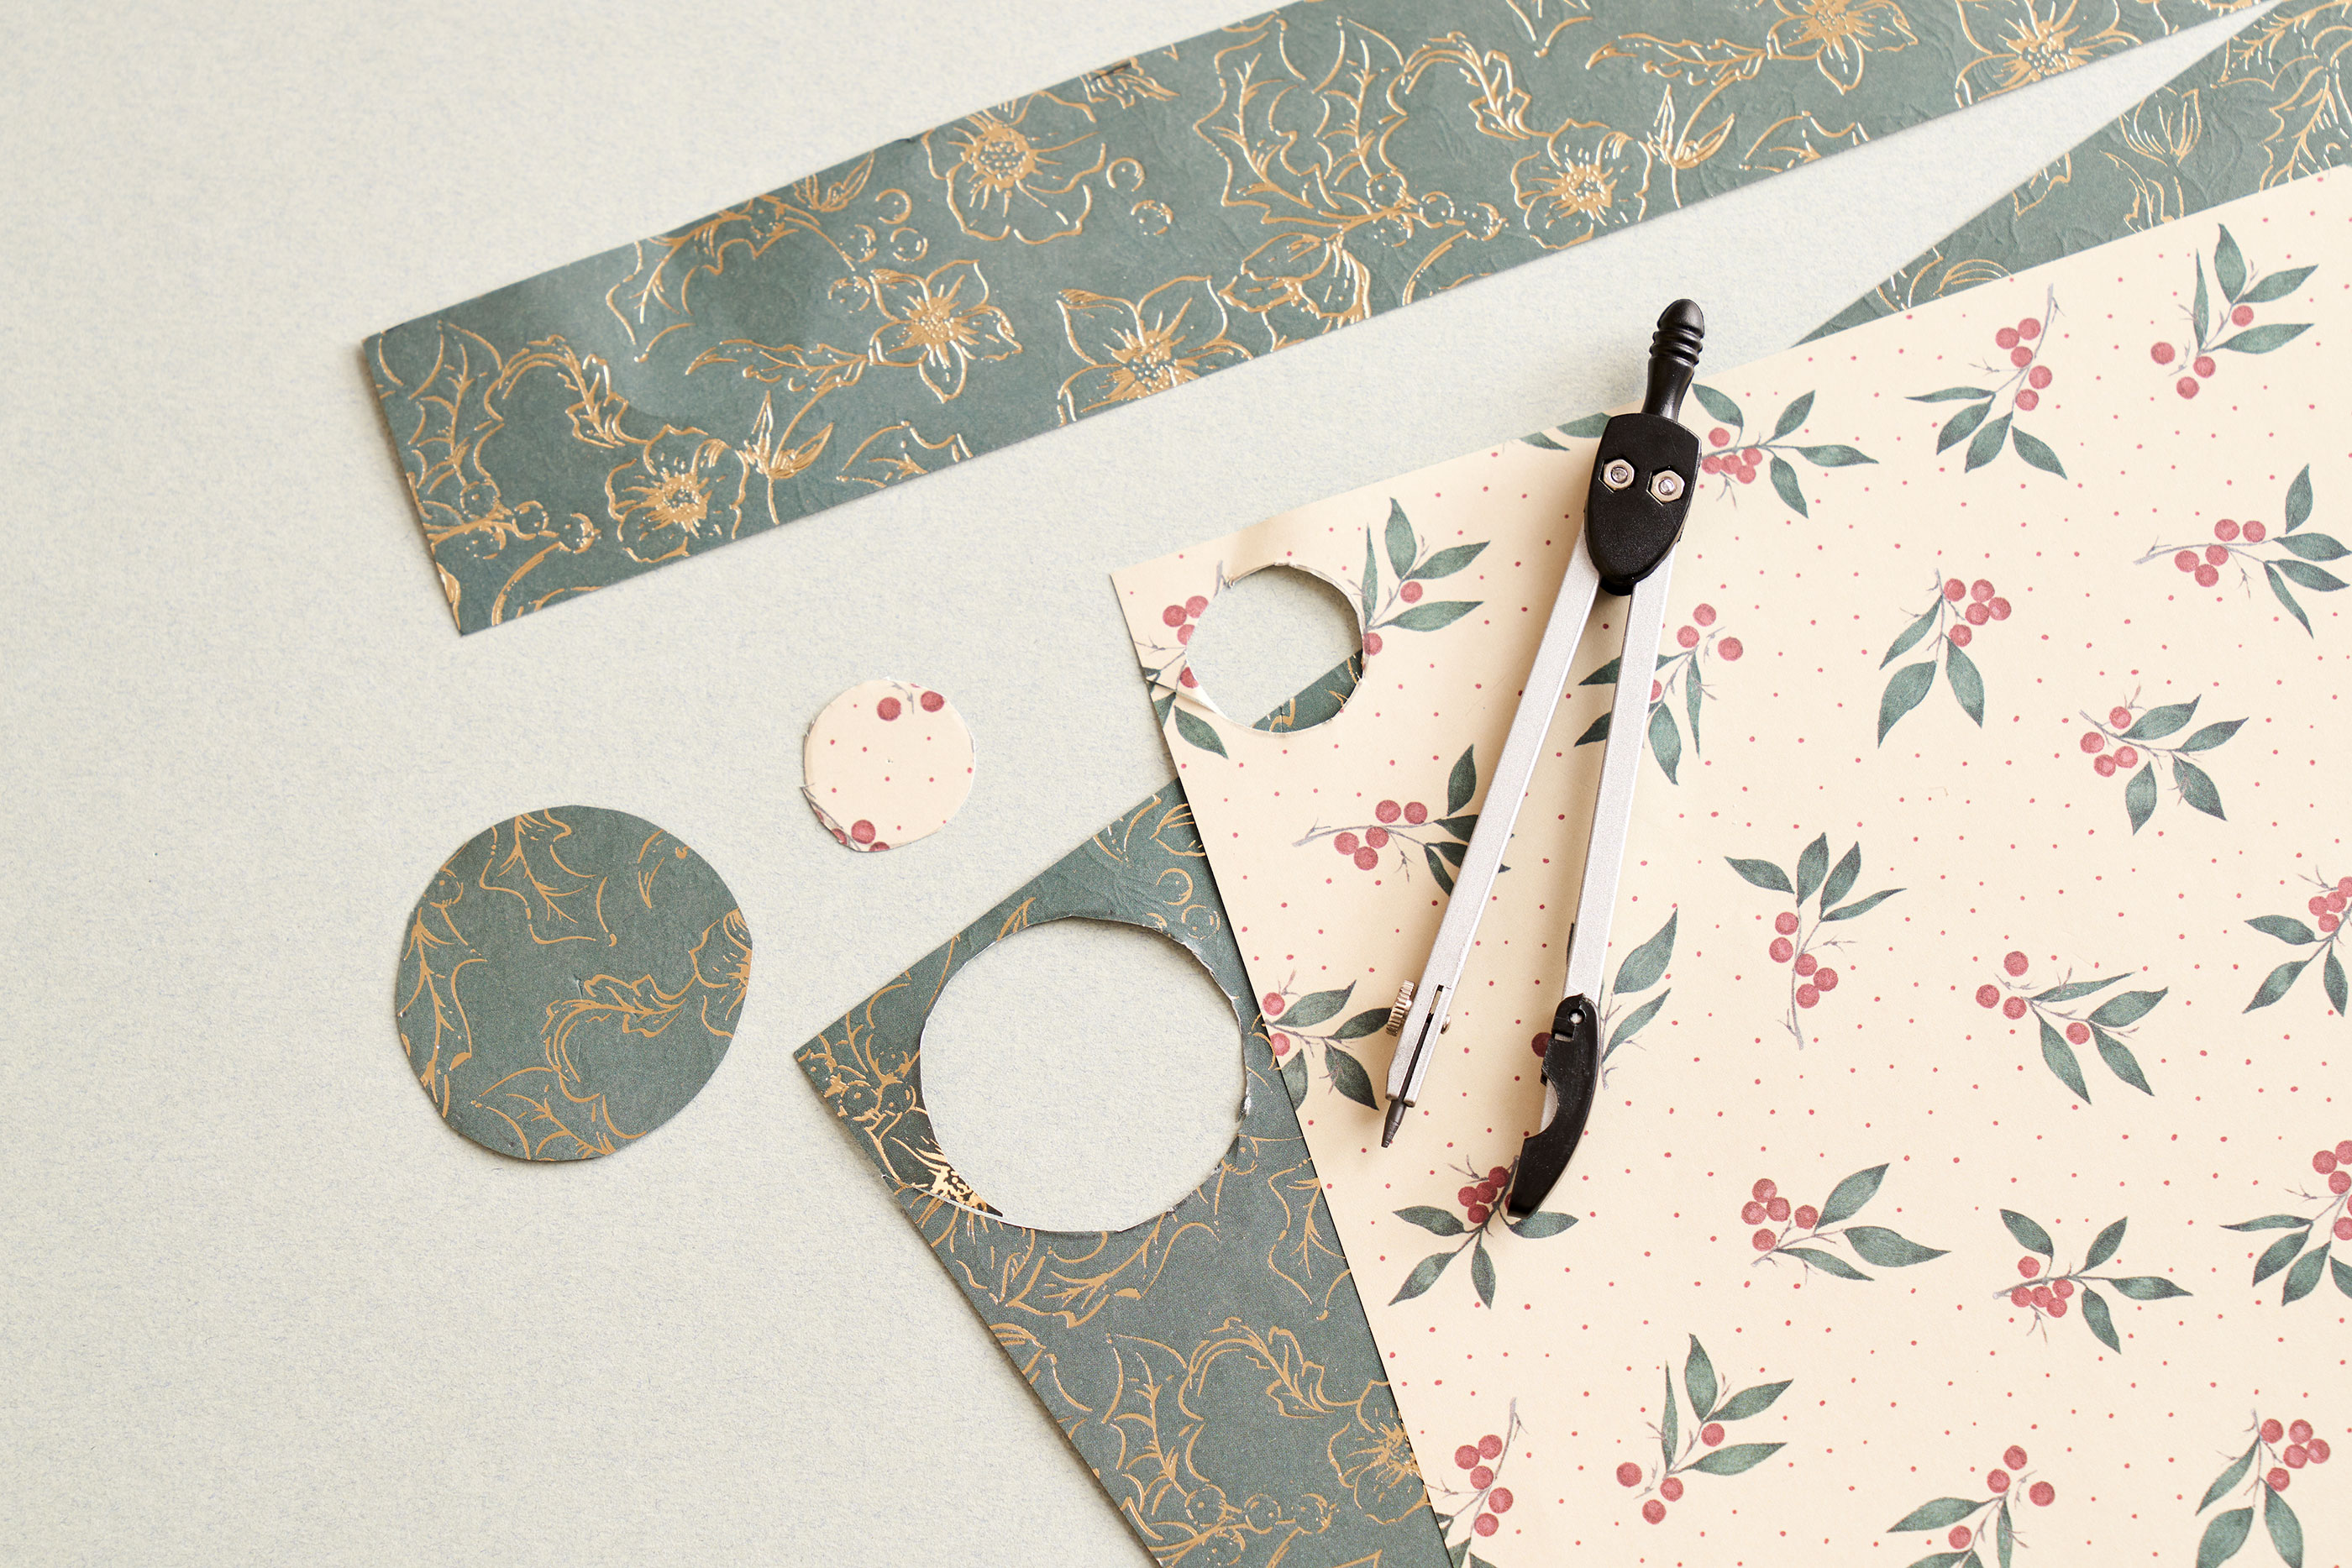
Measure and cut the paper strips for your rosettes. You need six rosettes and the widths of the strips should be 4 cm, 3.5 cm, 3 cm, 2.5 cm, 2 cm og 1.5 cm, respectively. For each rosette, you need two paper circles. Use a pair of compasses to draw six circles with a radius of 2 cm for the three largest rosettes and six circles with a radius of 1 cm for the three smallest rosettes. Cut out all of the circles.
Skref 2
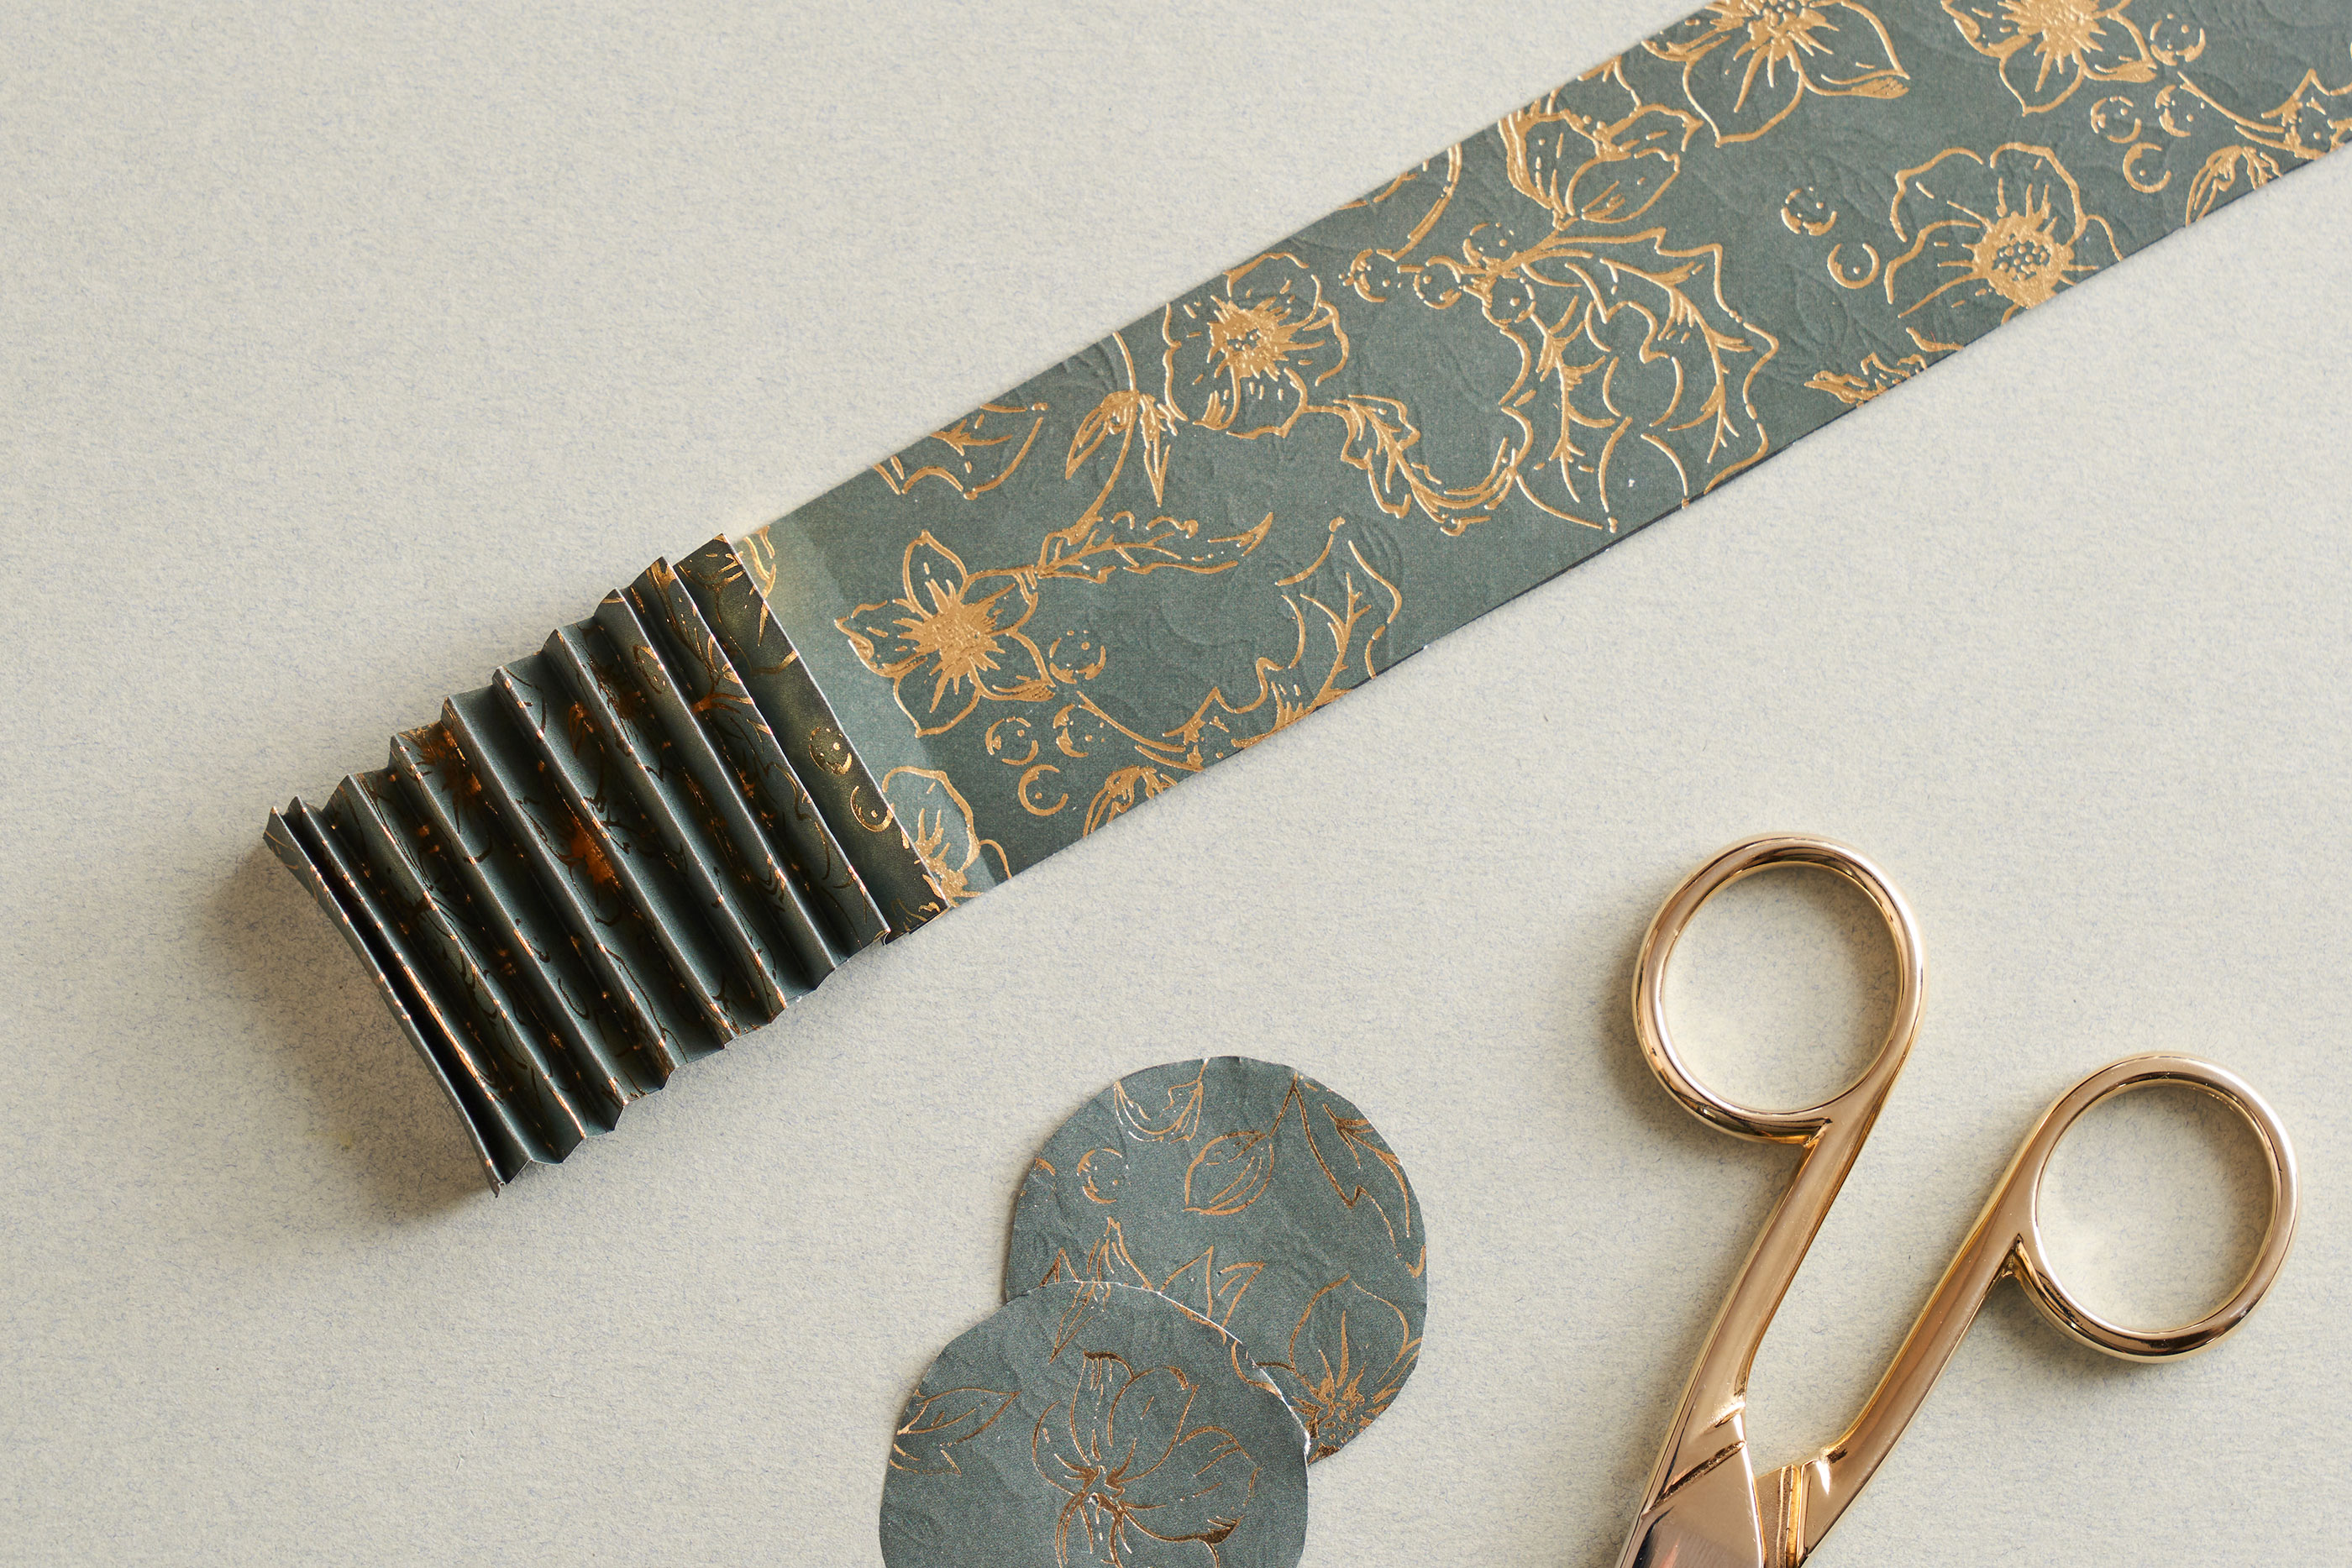
Fold all of the paper strips all the way down the length of the strip. The fold should be of a width of 1 cm until the entire strip is folded.
Skref 3
Form a circle of each strip by joining each end of a strip with double-sided adhesive tape.

Skref 4
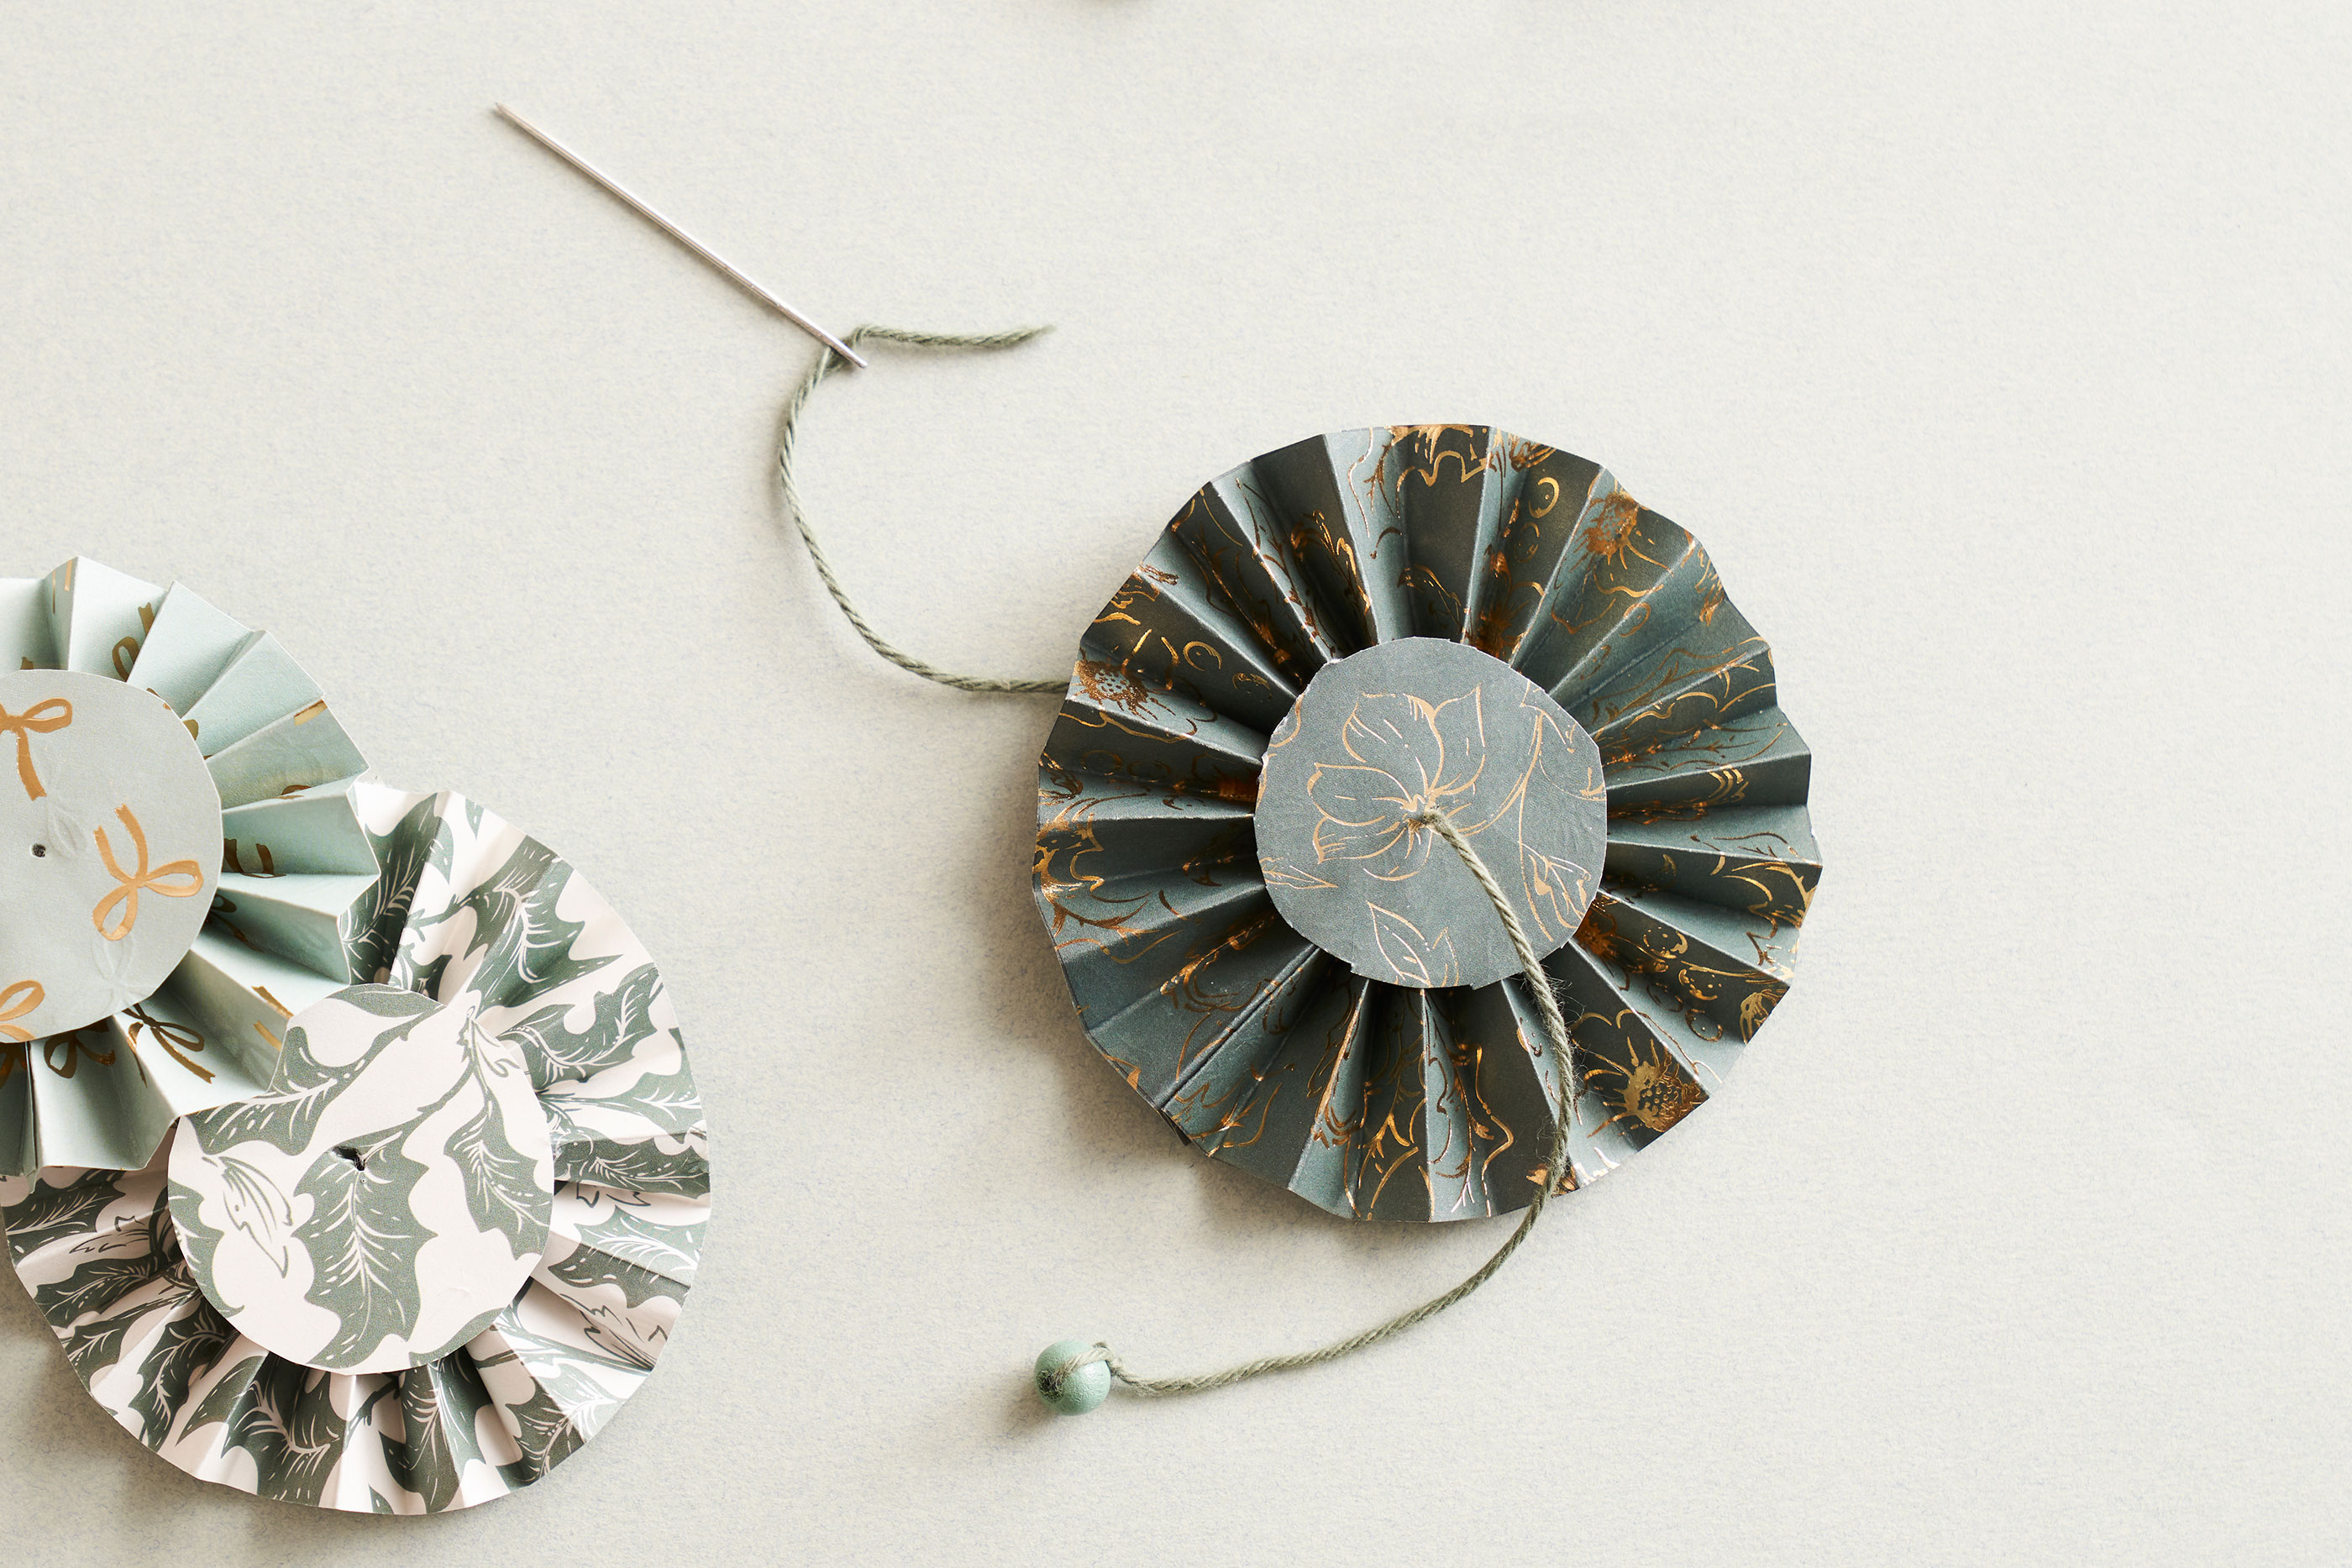
Use the glue gun to glue around the edges on the back of one of the paper circles. Slightly and carefully flatten the corrosponding rosette and glue the circle onto the rosette. Flip the rosette and repeat the process on this side. Repeat this step for all rosettes.

Skref 5
Cut a string of yarn of approximately 30 cm. Tie a lovely bead at the end of the yarn. Use the embroidery needle to make a hole through the middle of the largest rosette and pull the string of yarn through the hole.
Skref 6
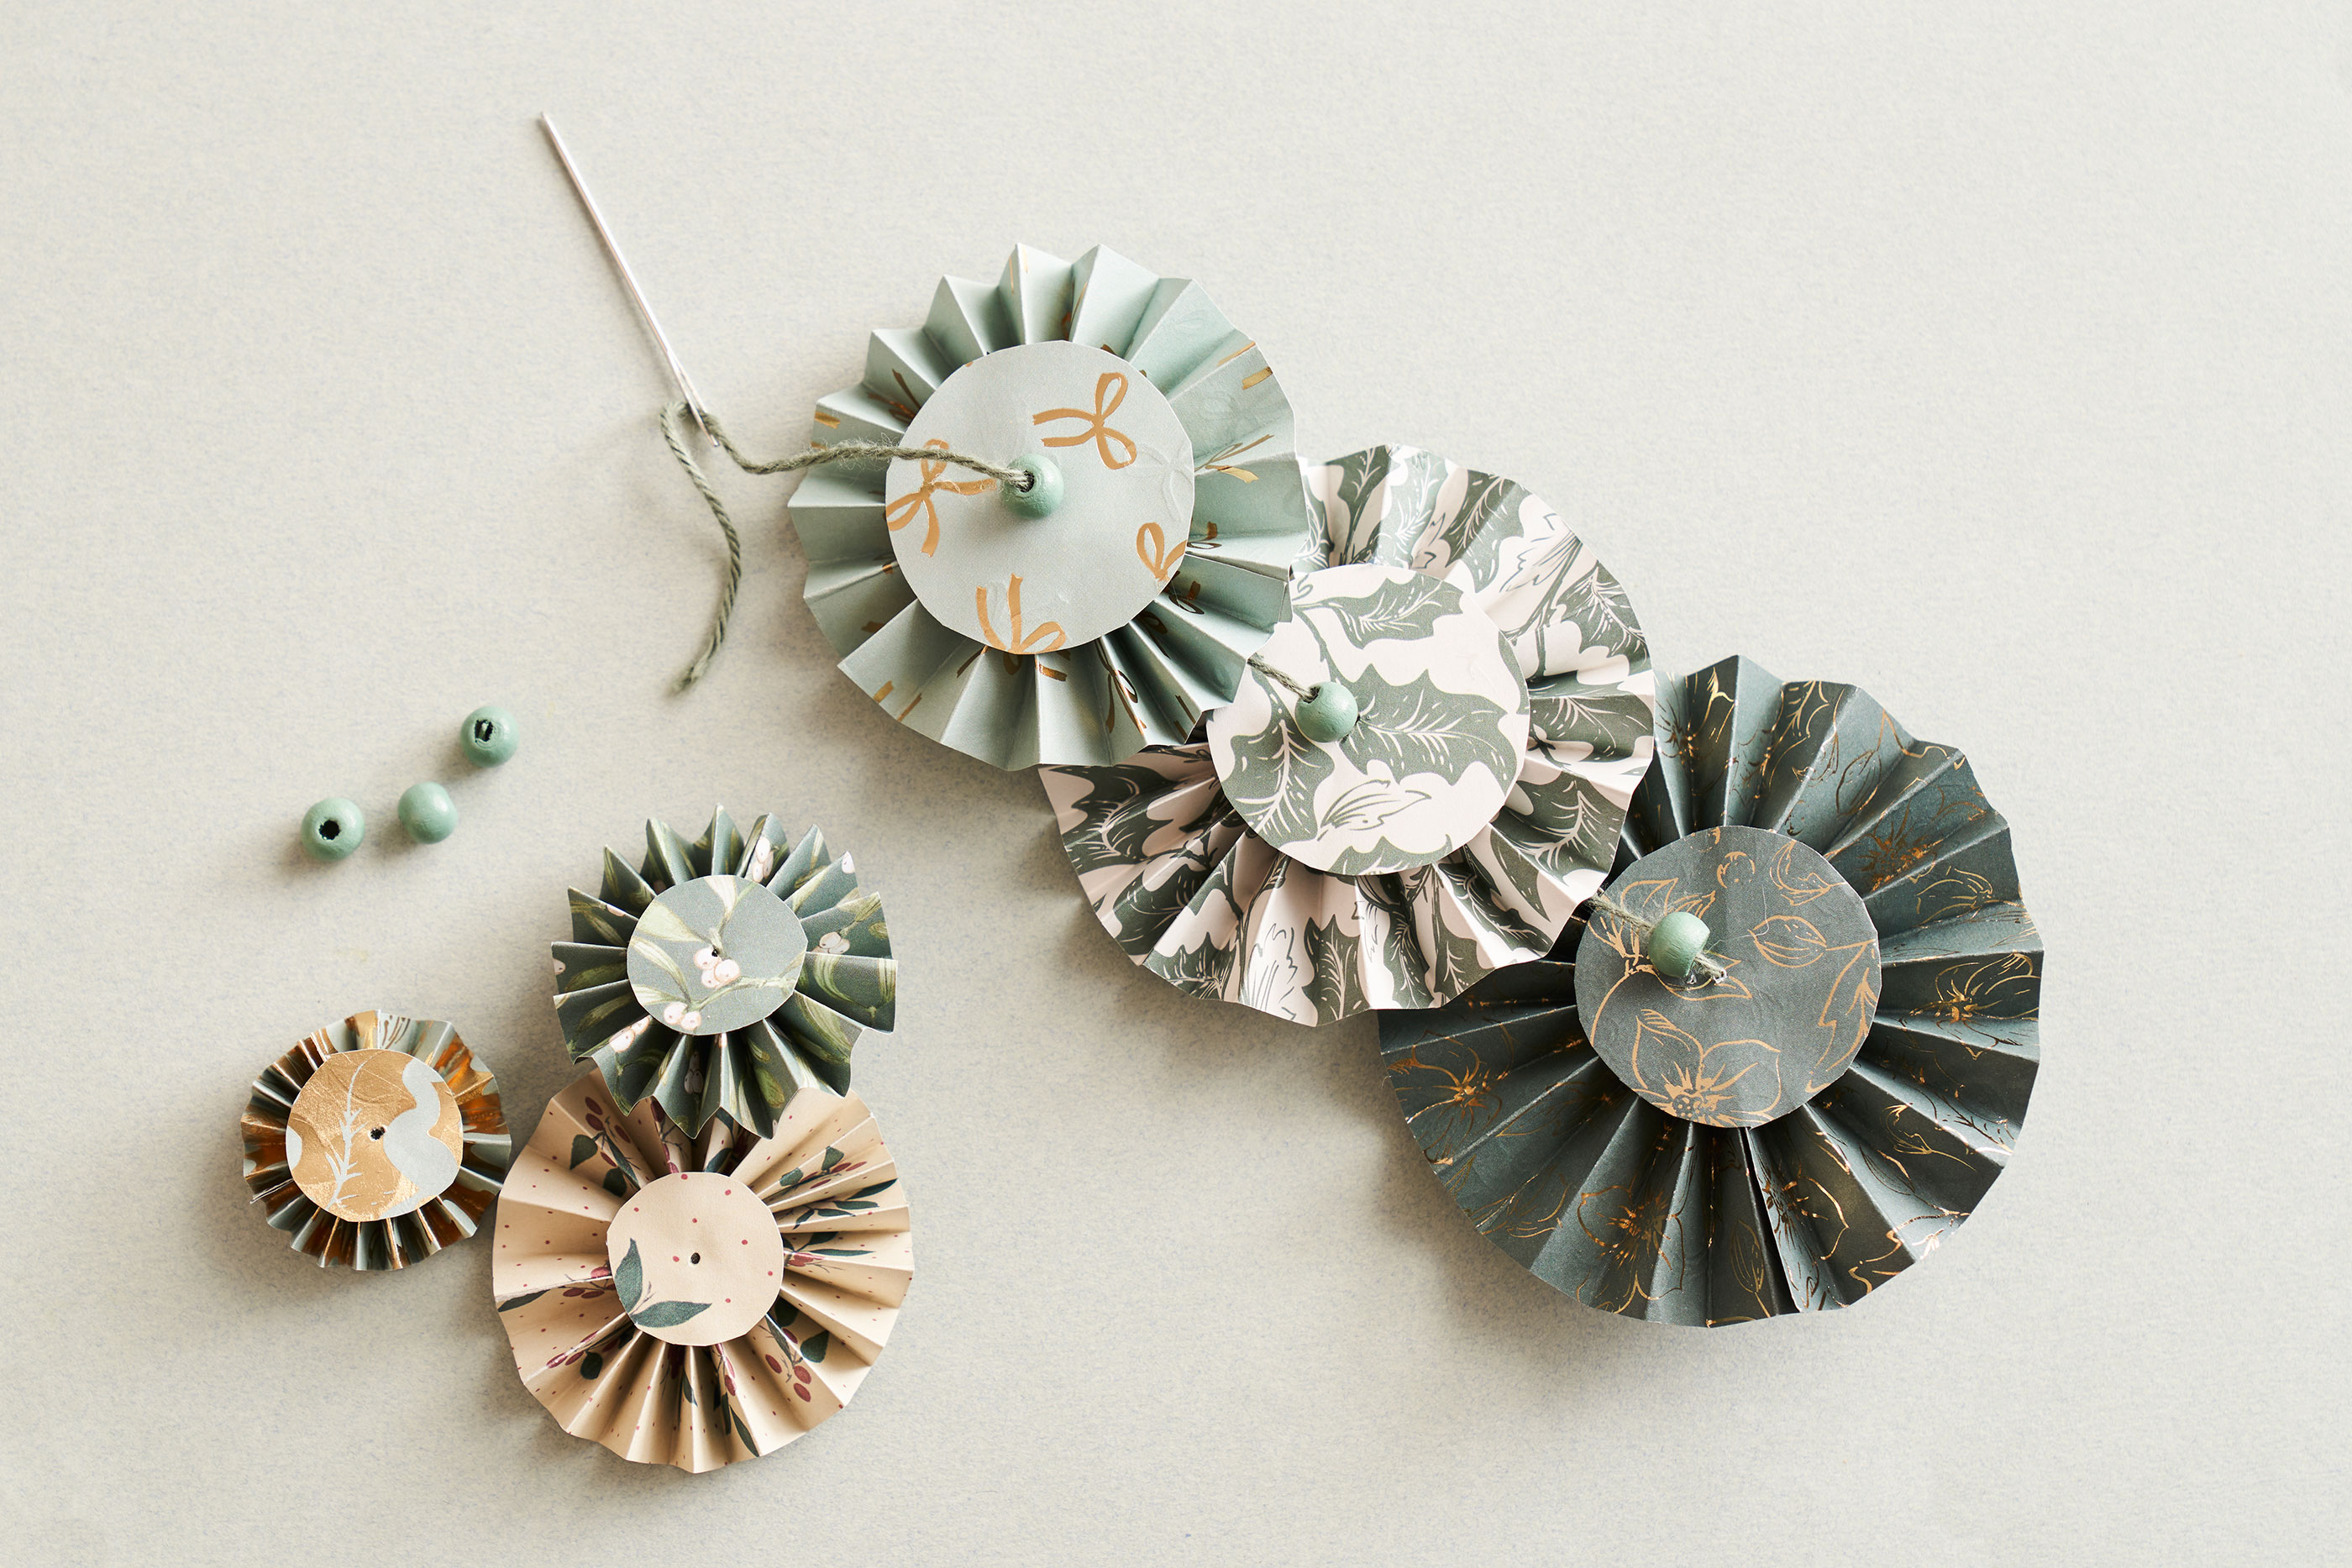
Tie another bead onto the yarn and continue the pattern of adding a rosette, then a bead, and then a rosette until all rosettes are used. Make sure that the rosettes are added in order according to size and that the largest rosette is at the bottom and the smallest is at the top, so that it will result in a lovely Christmas tree. Finish your Christmas tree with a bead at the top.
Skref 7
Tie a knot and a loop right above the top bead with the remaining yarn. The Christmas tree will now be easy to hang so it can adorn your home during Christmas.