- Vinsælar vörur
- Heimilið
- Sköpun
- Veisluvörur
- Ritföng
- Börnin
- Fylgihlutir
- Matur og drykkur
- Fegurð
- Útilíf
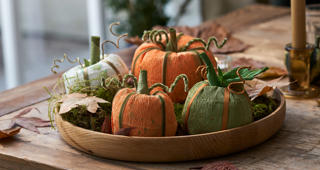
Crepe paper pumpkin 13. October 2022

Perfect for Halloween
Marvellous crepe paper pumpkins, which are perfect for Halloween. "They will last forever. Unless you try to put a candle inside them," Anna chuckles.
Material List
Skref 1
Cut a piece of a kitchen roll.
Skref 2
Glue DIY padding around the roll.
Skref 3
Cut a piece of crepe paper to fit the roll with padding. You should have approx. 5 cm overlap of paper on both sides of the roll with padding.
Skref 4
Gather the crepe paper around the roll like a cylinder with a glue gun.
Skref 5
Shape the crepe paper lightly and fold it in to the kitchen roll from both ends.
Skref 6
Add a piece of ribbon to a big needle and wrap it several times around the crepe paper through the hole in the middle. In the end, both ends of the ribbon should come out the top of the pumpkin.
Skref 7
Cut a piece of metal wire and bend it in the middle. Stick it through the hole in the middle of the pumpkin from the bottom.
Skref 8
Wrap ribbon around the two ends of metal wire sticking up from the pumpkin, and secure the ribbon with glue on the entire pieces of metal wire. Cut the ends with side-cutting pliers.
Skref 9
Cut a piece of green crepe paper. Roll and glue it together before gluing the roll to the top as the stem. Make a little stem for the bottom of the pumpkin the same way.
Skref 10
Curl the two pieces of metal wire by wrapping them around your finger.
Skref 11
Dip a wet brush in the green shades of the watercolour palette. The green colour should be mixed fairly intense. Make splash effects with the paint on the pumpkin.
