- Vinsælar vörur
- Heimilið
- Sköpun
- Veisluvörur
- Ritföng
- Börnin
- Fylgihlutir
- Matur og drykkur
- Fegurð
- Útilíf
- Athyglisverð kjarakaup


Decorative and practical plant labels 26. March 2019

With self-hardening clay, you can easily make personal plant labels which will look decorative while helping to keep track of your plants.
Material List
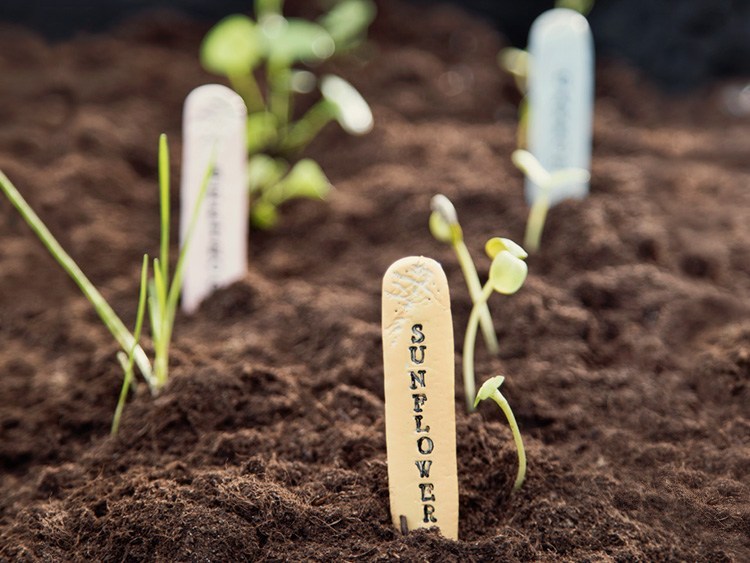
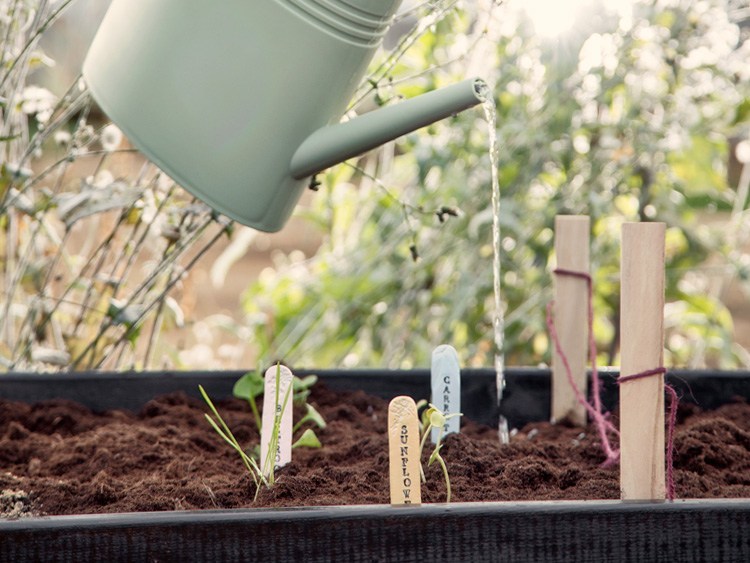
It is exciting for children and adults alike to follow the growth from seeds to sprouts to full-grown plants. Anna and Clara recommend that you use home-made plant labels to know the difference between the different plants you have sown. Plant labels will make it easy to distinguish the sprouts from one another, and they will also embellish the raised bed, the window box and the flowerpot. “Once you have made the plant labels, you can reuse them season after season,†says Clara, who is enthusiastic about the recyclability of this DIY project.
Ideas for use of plant labels
In the kitchen garden and greenhouse
Use the sisters’ plant labels to keep track of everything from tomato plants to herbs in your kitchen garden or greenhouse.
In raised beds, big pots and flowerpots
Once you have sown the seeds, it can be difficult to distinguish which seeds were planted where in your raised beds and pots. For this purpose, Anna and Clara recommend the home-made plant labels.
In your herbs indoors
Equip herbs in your kitchen with the decorative plant labels, which will also help the entire family distinguish different types of herbs.
Method
On a piece of baking paper, form the self-hardening clay in the shape you prefer. You can, for example, roll the clay into an oblong round shape, before rolling it flat with a rolling pin. If there are any uneven edges, you can slide a wet finger over the areas and smooth it out. Finally, make a pointed tip at the end of the plant label, so it can be put in the soil easily.
Decorate the plant labels. It is a simple task to write the name of the plant by using the Søstrene Grene’s easy-to-read letter stamps. You can also use fine stamps with motifs or fresh leaves and flowers to make imprints in the clay.
Let your plant labels dry between two pieces of baking paper overnight. Place a book or another heavy, flat object on top of it the first night. Then remove both the book and the top layer of baking paper to allow the clay to dry completely. The clay is hardened after 24-48 hours depending on the thickness.
When the plant labels have finished hardening, you can decorate them with paint. Anna and Clara have chosen some fine colours for their plant labels, and then they have gathered the plant labels in a box from Søstrene Grene.
Apply clear varnish to the plant labels after the paint has dried. That way, they will be robust for both wind and weather, season after season.
Tip!
Keep a small bowl of water by your side when making the plant labels. That way, you are always ready to moisten your fingers, making the self-hardening clay easier to work with.