


Gift-wrapping
Gift-wrapping
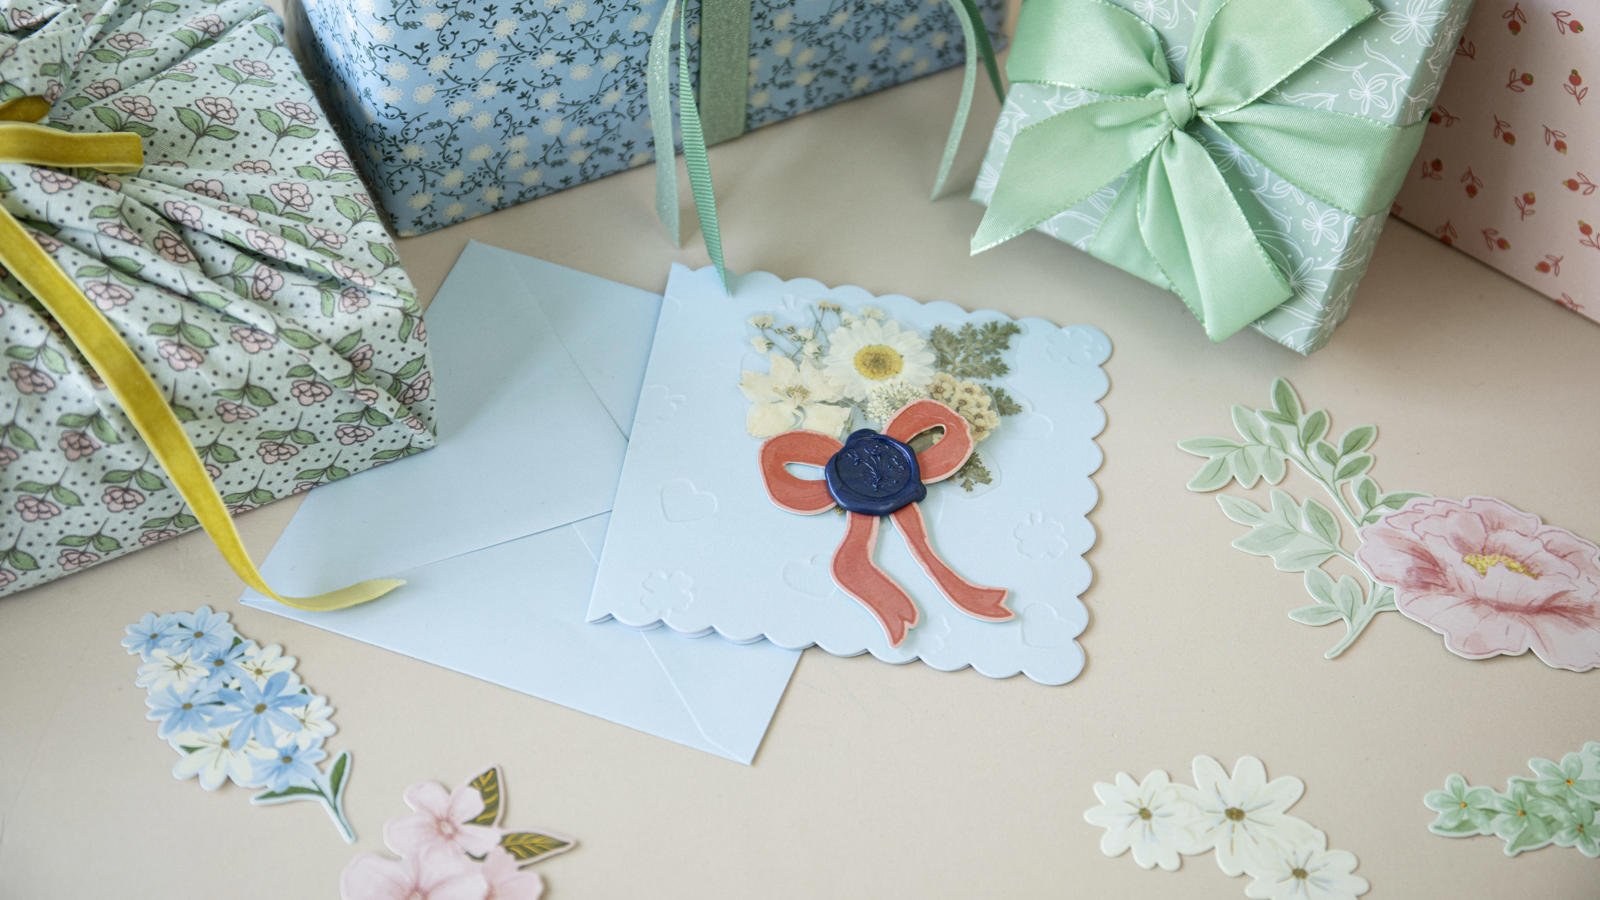
Greeting cards with 3D effect
Create a personalised card with delightful paper cut-outs and effects, and bring joy to a lucky recipient.
Begin by cutting out hearts and shamrocks from recycled cardboard using a punch, and glue them onto a piece of plain printer paper.
Place this paper on the light pad, and then put your greeting card on top. Trace around each shape using a dot art tool, so the shapes are embossed onto the card.
Open the packet of pressed flowers, and place them on the transparent piece of plastic. Apply tape to each flower so that it is enclosed between the plastic and tape, and cut out the flowers one by one, remembering to leave a few millimetres from the flower itself.
Now, attach the flowers to the card with double-sided tape or foam pads to create depth in the card. You may choose to arrange the flowers as a bouquet.
Finally, attach a bow from the paper shapes DIY set, and apply wax with the wax gun, and create a lovely seal. If you do not have a seal, you can also use the lid from a bottle or a coin. Allow the wax to dry, and then remove the seal stamp.
Now the card is ready to delight a lucky recipient.
-
Greeting card
-
Paper punch
-
Dot art tools
-
LED drawing pad
-
Paper shapes for DIY cards
-
Pressed flowers
-
Tape
-
Scissors
-
Double-sided tape
-
Foam pads
-
Wax and seal
