


Interior and décor
Interior and décor
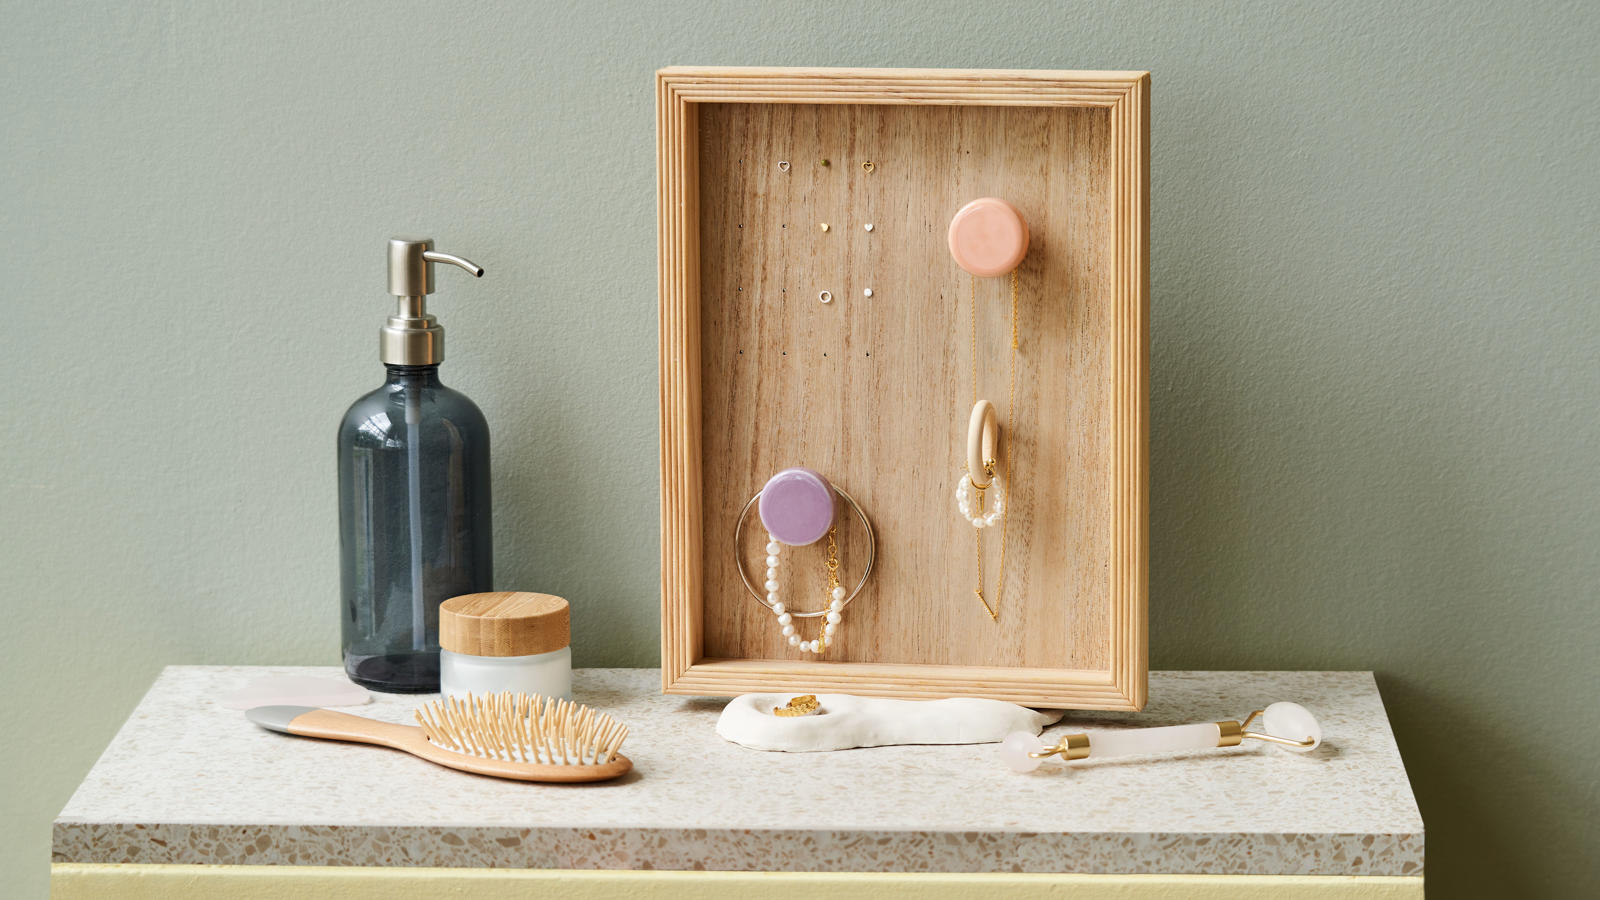
Make a jewellery stand from a wooden tray
The nieces collect jewellery, so Anna makes them this jewellery stand for them to store the jewellery safely and display it beautifully when not in use.
Make a foot for the jewellery stand from self-hardening clay. Carve out a little dent in the foot for rings. When the foot is the shape you like, lay a piece of baking paper on top. Press the wooden tray into the foot with the baking paper in between. Do not remove the tray until the clay has dried completely. It takes approx. 24 hours.
Cover the top left corner of the tray in masking tape until approx. a fourth of the tray is covered. The tape will help prevent the wood from cracking when you drill in it.
With a pencil, mark where the holes for stud earrings should go. Lay down a measuring tape inside the tray so it lines up with the top left corner. Make a pencil dot at 3 cm down, 6 cm, 9 cm and 12 cm. Now move the measuring tape so it lines up with the dots and make a new line of dots with 3 cm distance between each dot. Continue, until there are four rows of dots with four dots in each.
Now, mark where the knobs should go. Measure 6 cm out from the second dot in the row of dots farthest to the right, and make an X. Measure 7.5 cm up from the bottom in the left side and 5 cm towards the middle from here. Make an X. Put masking tape on top of these X's, and draw the X's on top of the tape too.
Mark where the wooden ring should go. Measure 9.5 cm down from the top knob X. Make an X.
Put a piece of scrap wood under the tray, and drill holes where the hole markings are. Note that you should not drill a hole at the last mark where the wooden ring should go. Use a 1.5 cm drill for the holes in the top left side for stud earrings, and use a 4 cm drill for the knob holes. Hold on to the tray when you drill. Remove the tape afterwards and erase any leftover pencil markings.
Attach the knobs. It might be necessary to shorten the screws of the knobs to make them fit the thickness of the tray. Use a hacksaw for this.
Glue the wooden ring to the last pencil marking.
Glue the wooden tray to the clay foot. The jewellery stand is now ready to use.
-
Wooden tray
-
Knobs
-
Self-hardening clay
-
Measuring tape
-
Pencil
-
Eraser
-
Clay tools
-
Wooden ring
-
Glue gun
-
Scissors
-
Baking paper
-
Masking tape
-
Drill
-
Hacksaw
