


Make your own meal planner
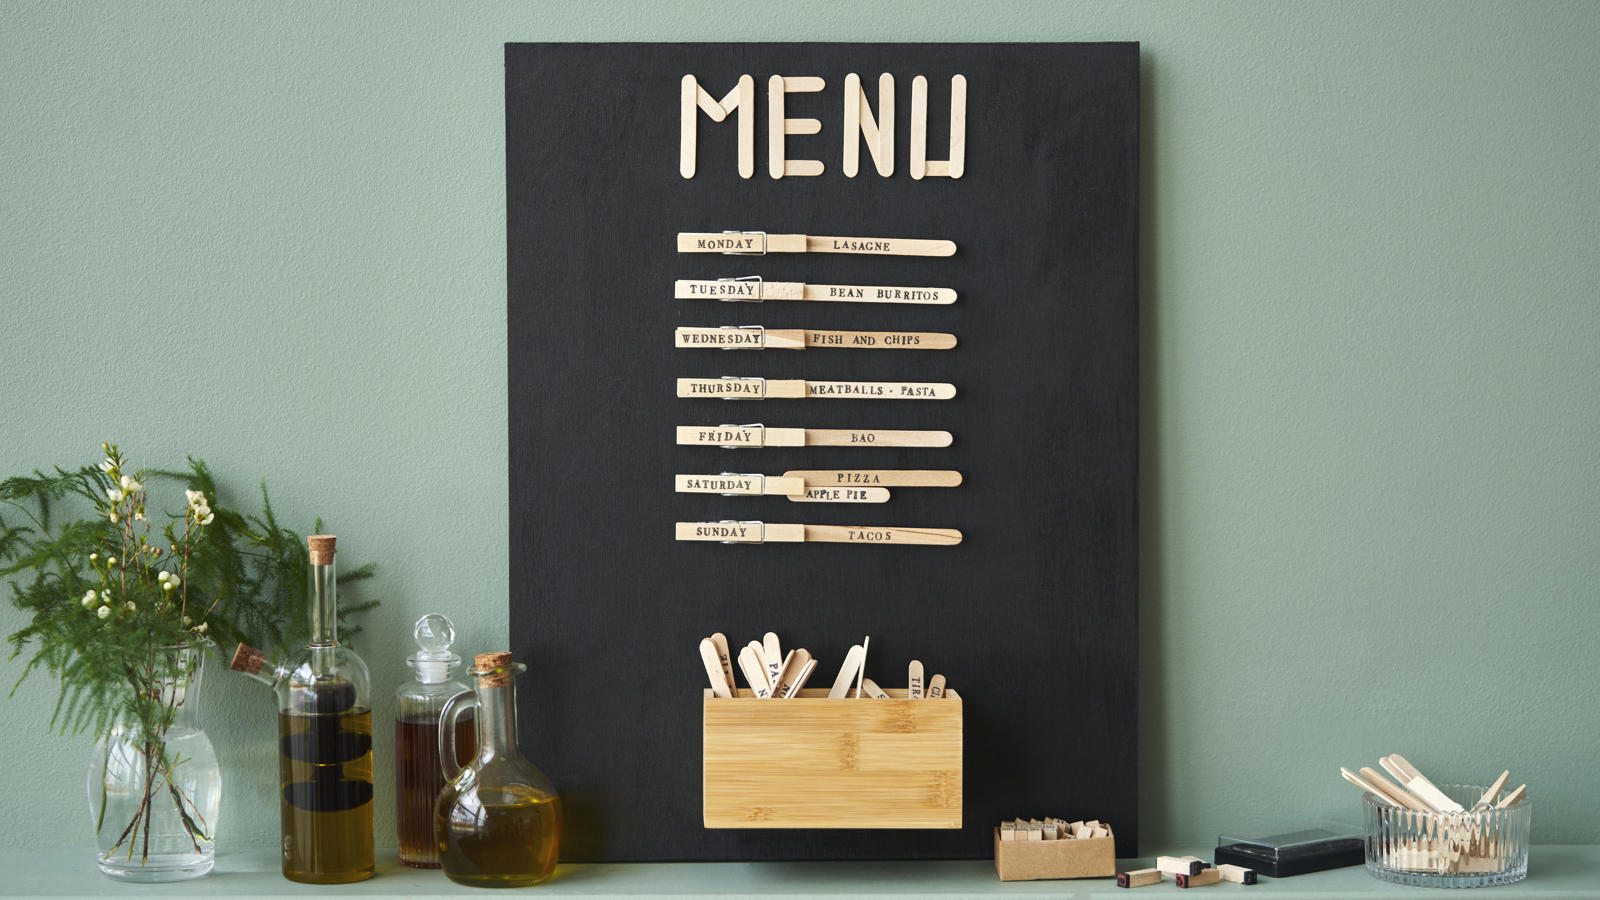
Do as the sisters do and create a weekly meal planner that can be displayed on the wall using a few simple tools. This way, all family members can follow along and look forward to today's menu. "Practical and convenient," Clara believes.
Start by painting your wooden board with acrylic paint in a colour of your choice.
Write the days of the week on 7 wooden pegs using alphabet stamps and a stamp pad. Remember to turn the pegs so that the gripping end faces right.
Next, write all the family's favourite dishes on the large wooden sticks, also using alphabet stamps and a stamp pad.
Now use the medium-sized wooden sticks to form the letters for the headline 'MENU'. Use a glue gun to glue the sticks together, and cut them with small garden scissors if they are too long.
Next, cut the toilet paper rolls in half with scissors, and place them in a small storage box, so the sticks can stand there without falling over.
Now all the elements are ready to be assembled on the wooden board once it is dry. Start by glueing the 'MENU' letters to the top of the board.
Glue the 7 wooden pegs with the days of the week onto the wooden board. Remember to turn the pegs so that the gripping end faces right.
Finally, glue the storage box to the bottom of the board, where the wooden sticks with various dishes written on them can be placed for easy access.
Now the meal planner is ready to be put into use. "Simply choose from the many favourite dishes and slot them into the pegs for each day of the week," Clara says.
-
Wooden board
-
Wooden pegs
-
Wooden stick set for DIY
-
Glue gun
-
Wooden alphabet stamps
-
Stamp pad
-
Ruler
-
Pruning shears
-
Acrylic paint
-
Brush
-
Box
-
Toilet paper rolls
-
Scissors

